I promised I would show before and after photos of our house. Here are photos from when the house was almost a shell. We saw through the ugly to what it could be. Now we are proud to live here. It is a grand old house of a period in Houston’s history when most homes being built were victorian in characteristic. But some neighborhoods were building in a new form called “arts and crafts“. Our house’s original owner liked the “arts and crafts” details that he had built into this house – the square decorative windows, the square columns on the bottom porch. These are identical to others surrounding us. However, what makes this house stand out in it’s uniqueness is the Victorian porch on the top floor with its round columns. Also the “arts and crafts” homes never had a rounded or “wrap-around” porch. Ours does. In fact when speaking to the ninety-year-old neighbor down the street whose grandfather was the second owner of our house in 1914, she said the porches have always been the way they look now.
This back porch was added in 1978. It doesn’t match anything.
The before picture of back of house shows how the bottom portion of the porch fell off during the raising and leveling of the foundation. Frankly I was surprised this was the only thing that fell off. On the inside a lot of the upstairs ceilings crashed to the floor, and great craters appeared in the walls. Here you can see the huge plant that had grown into the ground and COULDN’T be moved. It was taking over the back porch area so I had to hire someone with a chain saw to cut it out. Upstairs you can see the boards that are framing what will be the bathroom window. That had been a another door.
 Now in the after picture you can see that the upstairs porch no longer has the lattice board, you can see the bathroom window of glass brick, and you can see the downstairs porch (now piled with the stuff that needs to go in a shed), the new steps, and the outside of the new mud room.
One of the most dramatic changes happened to the lowly downstairs bath/laundry room. It was located under the double stairs.
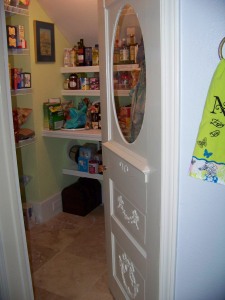
 You can see the hole in the floor where the toilet had been. This is just next to the kitchen. So I decided this would make a better pantry than utility/bathroom. So here is the “after” picture of the pantry.
The original Victorian front door was re-purposed for this room. But we still had to put in a bathroom. Behind the original bathroom wall was an empty hallway. Here are the before and after pics of the downstairs bath.
First the hall is gutted. You can see the original wall.
 Now everyone who sees this thinks it is an original bath room. It is tiny and I used the period details to make it seem very old.
And then the laundry had to go somewhere. My husband had the brilliant idea to put it upstairs next to our bedroom. We aren’t getting any younger and there is always laundry to do, right? So we took a huge, wide hall that led to the upstairs front porch and divided it into three sections. Hall to stairs, our room, the guest bathroom, next section became part for the laundry, and the next section part “sitting area” library in the master bedroom.
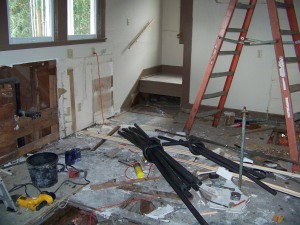
So first the laundry – 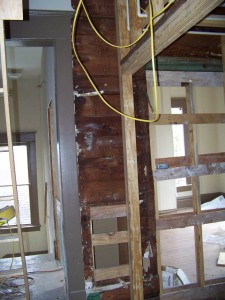 This shot shows the laundry being framed out within that hall area. Two bedroom doors had to be moved in the process. You can see the one doorway being framed in now. Also to the left are the stairs down and the huge window over the stairs.
 Laundry AFTER. This is a shot taken in the same direction.
And this was taken with the laundry doors closed. 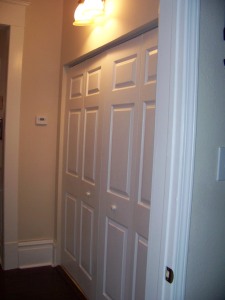
Now behind this laundry room is the master bedroom library. There is a door to the right of the desk that leads to the upstairs front porch.
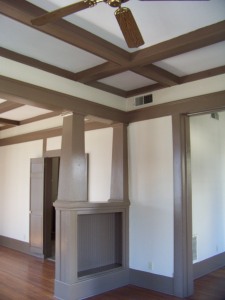
When you walk in the front door and look to the left there is the nice sized living room. We filled in a door and that gave us a wall there. (I will show you that view from the outside.) What struck us about the living room and dining room were the ceilings. There are nice beams there. They were always meant to be painted wood (low quality boards were used instead of lumber) but we painted them as to seem like wood. Here are the before and afters.
Here is the BEFORE
Of course books and furniture make a difference.
 Here in the AFTER you will note that behind the chair is a pocket door. When we first entered, I knew the doorway to the left was much too wide. It made the entry room and the living room into a big odd-shaped area. I knew I wanted the entryway to be private and able to be cut off from the noise in the living room if possible so I said “pocket doors”. The great thing about pocket doors is they take up no wall space. When the frame from the super-sized doorway was removed some original tracks for a pocket door were revealed. I knew that was what was meant to be there!
Now to the master bath. The master bath in this house used to be a bedroom. We took one bedroom and divided it into a master bath and master closet. The closet can never be too big in my opinion!
The before picture of the bath from the inside.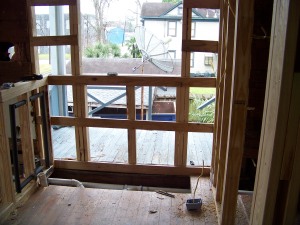 Here you can see out and across the porch to the neighbor’s yard behind us.
Now the after picture: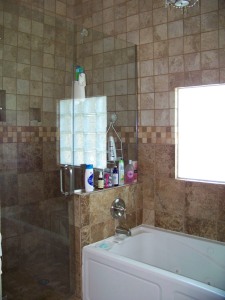 You can see on the right the glass block window that is reflected in the glass rain shower.
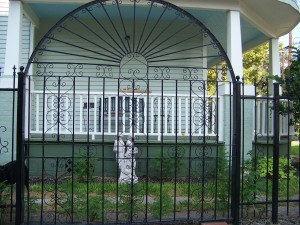
Here is a picture of the outside side view of the house. That is the living room wall that used to be a door.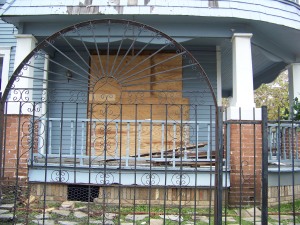 The porch hasn’t been leveled yet and all the railing replaced, and the iron fence hasn’t been welded together where it had fallen apart.
Now I’m getting to the part everyone wants to see – the kitchen! When I showed pictures earlier in the year of the gutted kitchen with the holes in the floor, people were commenting that nothing good could come of this. I like to think that the kitchen redo reflects my style of creating any art piece. I have had people comment that my art looks like a mess before it becomes anything identifiable. When I work with gauche, I know this to be true. Everything must be broken down to its ugliest most prehistoric form before becoming what it is meant to be. With gauche you have to see the negative in whites before the positives can be applied in darker paint to create the picture. It is the way with any reconstruction project or any creative attempt. Sometimes you just have to work backward to get forward.
Sidebar: this philosophy works when cleaning out a closet.
Here is the kitchen pre-gut:
But wait! Add cabinets, new floors, appliances, fun light fixtures, an amazing faucet and voila!
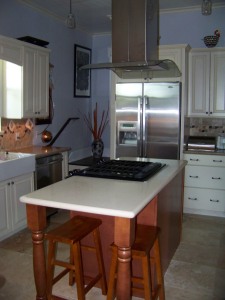 This is from the same angle as the gut picture. Note the mason jar lights. Cute, huh?
Let me share a few more angles.
 Where the brick column is was sheet rock. We wanted to expose the column. This is an original 100-year-old chimney flue. There is a hole in the brick near the ceiling where the original kitchen’s wood-burning stove’s pipe took the heat and smoke up and out. This brick goes from the dirt, through the roof.
Here is a picture when they were taking out the sheet rock and ugly cabinet. This is a perfect spot for a Wine bar. Don’t you see it, too?
 Not completely finished (this was one of those projects the builder decided he didn’t need to do.) but we will be adding the cabinet before long. Meanwhile it functions well in its capacity.
So how did we make all the porches seem like they belong on the same house? I mean after all the front porches are in two different styles and the back porches were added in 1978. Welllllll. We made all the porch railing match all the way around and up and down.
Thank you for viewing my pictures and the year-long effort of re-making a 100-year-old mess into the beauty it was always supposed to be.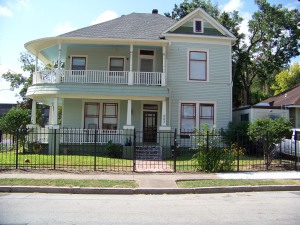



Thanks for finding me and thanks for the blog about your house. Very interesting and fun to see! Malcolm will enjoy this when I can get him away from his projects!
LikeLike
Rebecca, this is an awesome post. Having seen the before, I can vouch for the fantastic job you guys did. Congratulations! Your home is beautiful. Maria
LikeLike
Thank you! You know what we struggled with, too.
LikeLike
Rebecca – Lovely remodel job and your house is lovely, too. I enjoyed looking at your pics. Did you do the work on your own? Enjoy.
LikeLike
Thank you! We had a contractor. I won’t do that again. I would use sub-contractors. We did a renovation at our last house, also a hundred year old house, and the work went much smoother because we found good companies to do the work. There was no middle-man to confuse things.
LikeLike
I noticed the bananas on the stove, how do you cook them? *snicker* The pics look wonderful, congrats on the job well done!
LikeLike
Fantastic! You guys did a marvelous job!!
LikeLike